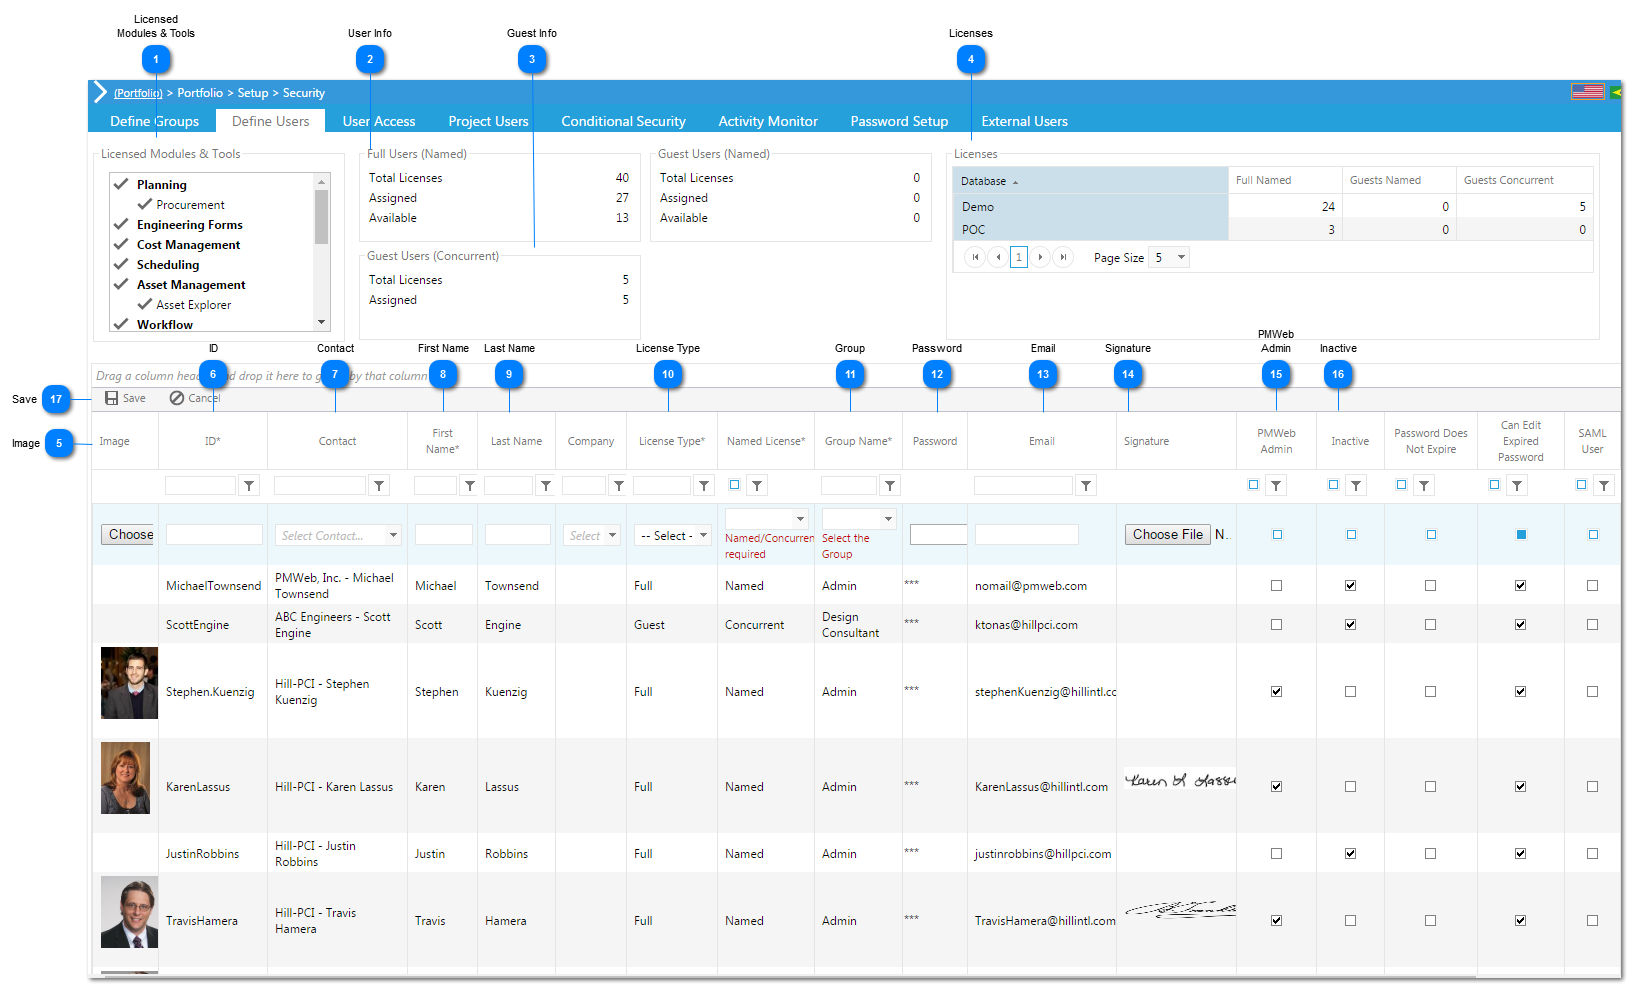
PMWeb Users must be defined and added to a respective security group. Users also are assigned a License Type.
 Licensed Modules & ToolsIn this area, the PMWeb Modules that the client has purchased are checked.
|
 User InfoThis area displays the Max. Number of Full Licenses the client has purchase. The number of Named and Concurrent Licenses that have been assigned, and the number of Licenses still available.
|
 Guest InfoThis area displays the number of Guest licenses that have been assigned and the total maximum number of concurrent guest licenses that can be in use simultaneously.
|
 LicensesThis section provides a summary of assigned licenses by database.
|
 ImageClick the browse button to upload a photo of the User.
|
 IDEnter a unique User ID. * signifies this is a required field.
|
 ContactThe Contact dropdown pulls from the Companies list located in Portfolio>Lists>Companies (all users should first be uploaded to the company module as contacts). If this method is used the majority of this information contained within this grid will be automatically populated.
|
 First NameEnter the user's first name. * denotes this is a required field.
|
 Last NameEnter the user's last name.
|
 License TypeSelect the user's License Type, either Guest or Full. Based on the license type selected, a named/concurrent license will need to be selected.
|
 GroupSelect the User Group this particular user will be a member of. The User Group was created in Define Groups. |
 PasswordA default password for the user can be entered here
|
 EmailEnter the user's email address
|
 SignatureIf a user has a signature file, you can upload it here. This is used for the approval process in Workflow where signatures are required.
|
 PMWeb AdminCheck the box for PMWeb Admin if the User is granted access to the Administrative tool to PMWeb.
|
 Inactive InactiveCheck the box for Inactive to make the User inactive. If this box is checked the User name will not be displayed on the PMWeb Login Screen
|
 SaveClick the Save button to save the new User.
|
|

