Adding a New Project: Step 2
This module is used to enter new project information (and also update existing projects).
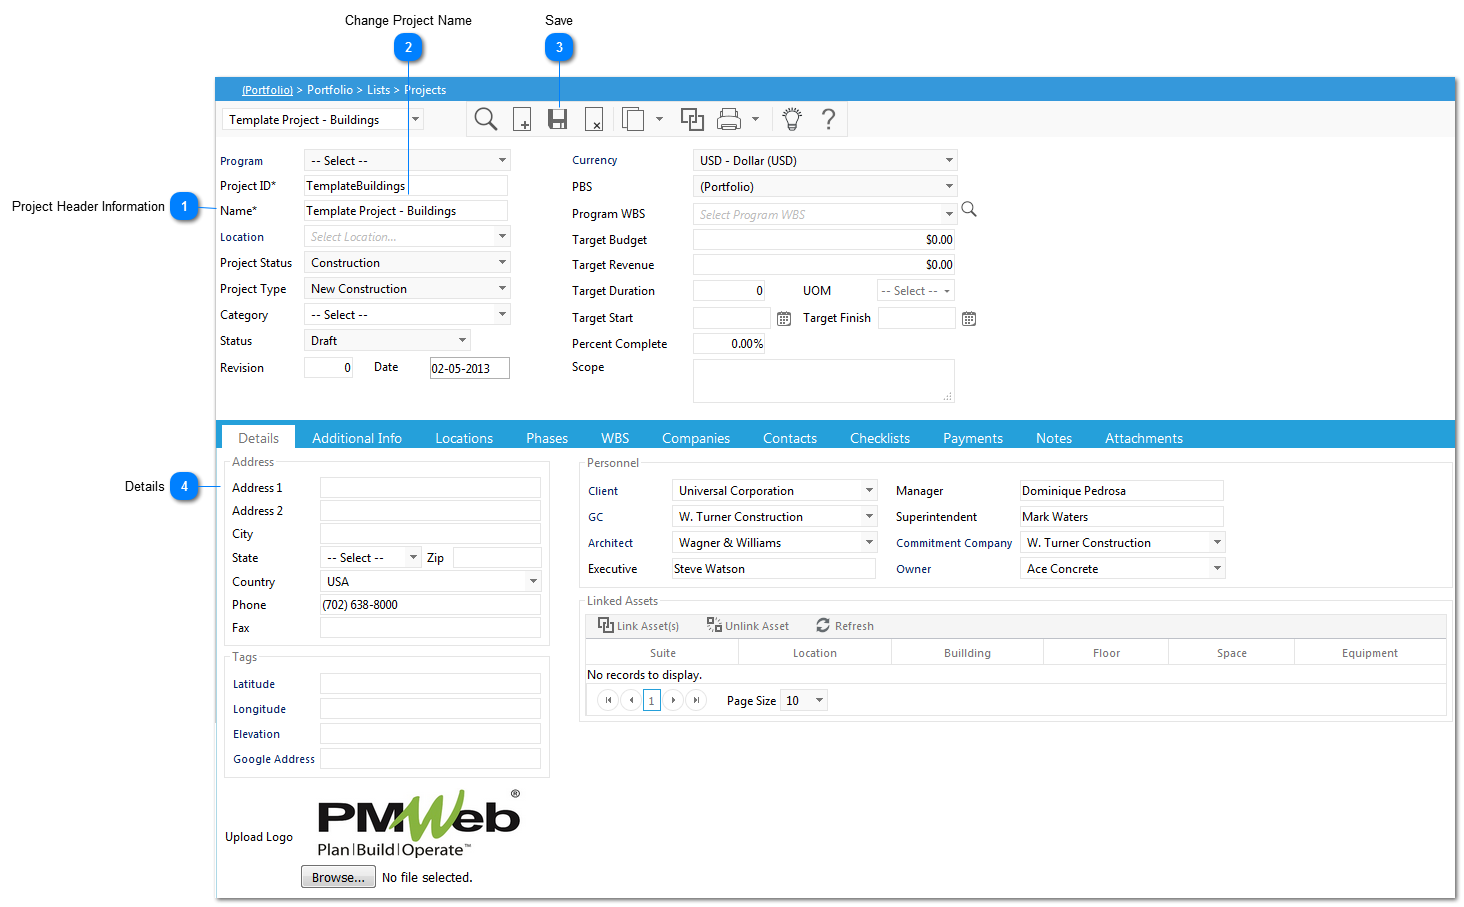
 Project Header InformationThe information located in these fields were copied from the existing Project/Project Template. They all can be changed. Note: Project ID and Name are required fields.
|
 Change Project NameOnce you copy the project, the name of your current project will take on the same name as the project you copied with a version after the name (1). You must rename the project.
|
 SaveClick the Save button to save the updated information into the new Project record.
|
 DetailsProject Specific information is entered into all of the fields in this tab. A Project Specific Logo can also be uploaded from this tab as well.
|