Navigation Path: Planning > Portfolio Planning > Investigations
Investigations are preliminary (high level/conceptual) projects for the development of initial scope, schedule and estimates. Investigations are used to prepare an initial project PFR for routing and approval.
An Investigation is initiated by the COO's approval of a Facilities Service Request (FSR) via Triage signifing approval to expend resources to determine scope and create an estimate. An Investigation FSR is assigned to an FD&C or Planning Project Manager by the FD&C Manager. If the
1. Scope of work requires Furniture, PM initiates a Furniture WO in Compass. This notifies the Furniture Group and engages their resourses to assist the PM.
2. Scope of work requires Medical Equipment, PM contacts Equipment Coordinator via email. (There is no equipment WO system in Compass)
3. Scope of work requires IT data, PM initiates an IT service request in HP Service Catalog system w/ FSR#. If the client has initiated an IT service request, PM notifies IT to link SD# to FSR#. This engages IT to provide support to the PM
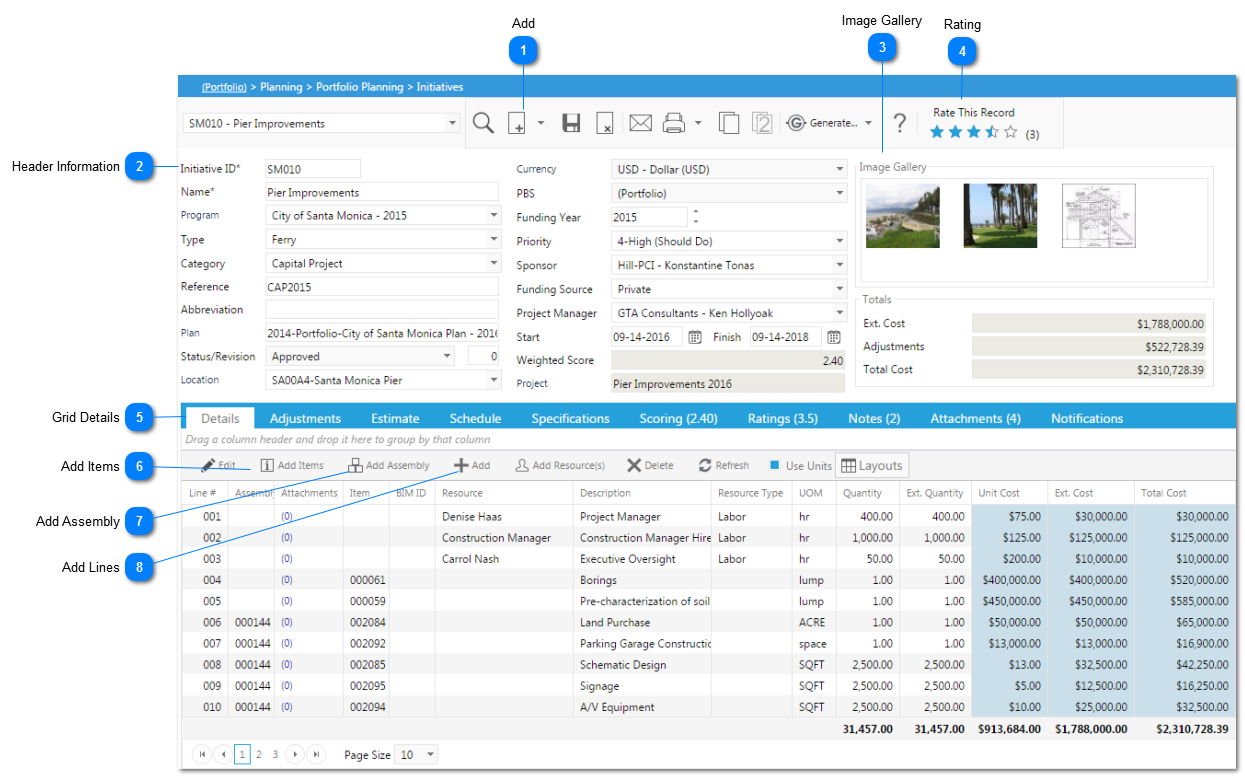
 AddOpen a saved initiative and click on the  button to create a new initiative. button to create a new initiative. From the drop down menu you can select an option to either create a new initiative or use from a previously created template.
|
 Header Information
Fill in the necessary information: * denotes a required field
Initiative ID*: this field be generated automatically, but it can be edited.
Name*: type a name for your initiative.
Program/Type/Category: use the drop-down lists to select the Program, the Type and the Category.
Reference: add a reference.
Abbreviation: add an abbreviation.
Plan: this field will be automatically populated when you link the record to a Portfolio Planning Worksheet.
Status/Revision: this field will be automatically updated if workflow has been configured with this record type. If not, you can change it manually.
Location: select the location from the drop-down list.
Currency: select the currency from the drop-down list.
Funding Year: use the spinner to select the funding year.
Priority: select the priority from the drop-down list.
Sponsor: use the drop-down list to select a Sponsor.
Funding Source: use the drop-down list to select a funding source (provided a single funding source is being used for the project, otherwise, leave blank and add the funding source in the Details).
Project Manager: use the drop-down list to select a Project Manager.
Start/Finish: use the date picker to select a start and a finish date.
Weighted Score: this field populates based on the ratings given to the record by the Rate this Record function or by the ratings tab data.
|
 Image GalleryGraphic images are displayed in the Image Gallery when selected to do so in Attachments.
|
 RatingClick on a star within this function to select a numerical rating for the record. A dialog appears allowing the rater to enter comments and save their rating.
|
 Grid DetailsLine#: This field will be automatically populated by PMWeb.
Item: This field will be automatically populated by PMWeb if the line was added via the Add Items function.
Description: This field will be automatically populated by PMWeb based on either the Item the Cost Code selected. Note: you can also add or modify the description if needed.
Assembly: This field will be automatically populated by PMWeb if the line was added via the Add Assembly function.
UOM: Select the unit of measurement from the list values (only viewable if use unit cost is checked).
Quantity: Enter the quantity (only viewable if use unit cost is checked).
Unit Cost: Enter the cost of the line item (only viewable if use unit is checked).
Total Cost: Enter the total cost of the line item (if unit cost is checked this field populates with the value of the quantity multiplied by the unit cost).
Cost Type: Select the Cost Type associated with the line item.
Cost Code*: Select the Cost Code associated with the line item.
Funding Source: Select the Funding source associated with the line item.
Company: Select the company associated with the line item if applicable.
Task: Select the task associated with the line item. The options available are based on the tasks established in the schedule module.
Notes: Enter details regarding the line item.
Note: To hide the fields that are not in use by your organization, right click on any header. Go to columns and uncheck the fields you want to hide then click Save Layout.
|
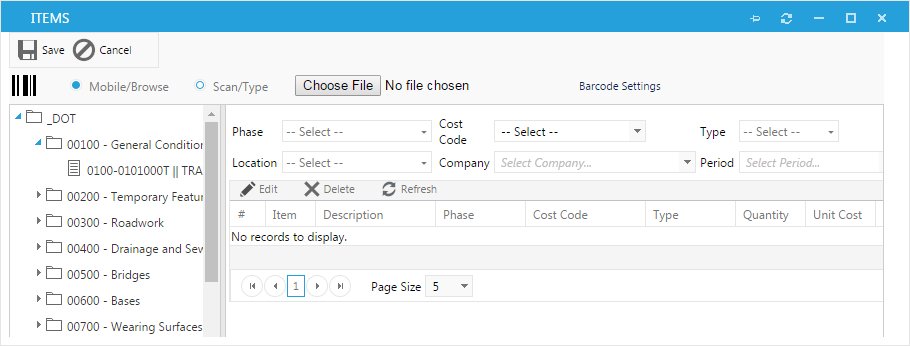
 Add ItemsClick on  to open the Items dialog. Here you can drag&drop predefined items from the left hand side to the right hand side. When you selected all your items, click Save to close the dialog. The line(s) will appear in the Details grid. Select the line(s) you added and click Edit to add information or modify them.
Note: Items are setup by your PMWeb Administrator.
|
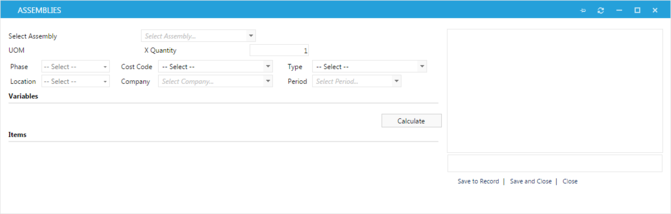
 Add AssemblyClick on  to open the Assemblies dialog. Use the drop-down list to select your Assembly. In the Variables grid enter the Quantities you need then click on the Calculate button. The Items grid is redrawn to show the quantity and the total cost of each item based on the variables you just entered.Click on Save and Close to close the dialog and add the new lines to your initiative.
Note: Assemblies are setup by your PMWeb Administrator.
|
 Add LinesIn the toolbar of the Details grid, click on the  button. A new line opens for editing. After you entered all the necessary information in the Grid Details, click Save to save your line. button. A new line opens for editing. After you entered all the necessary information in the Grid Details, click Save to save your line.
|