When you click most menu items from the PMWeb control panel, a special page, called a List/Manager Page loads. Manager pages are spreadsheets showing all of the records of that type for all active projects. Manager pages:
- Show a comprehensive “log” view of all of all records of a type for all active projects across your entire proposal,
- Can be customized by each user to display data in layouts that they prefer,
- Let you interactively group and filter your data in a number of ways,
- Allow you to navigate to records with a single click,
- Can be used to add records - you will be directed to another record screen (see next section),
- Can be used to delete records.
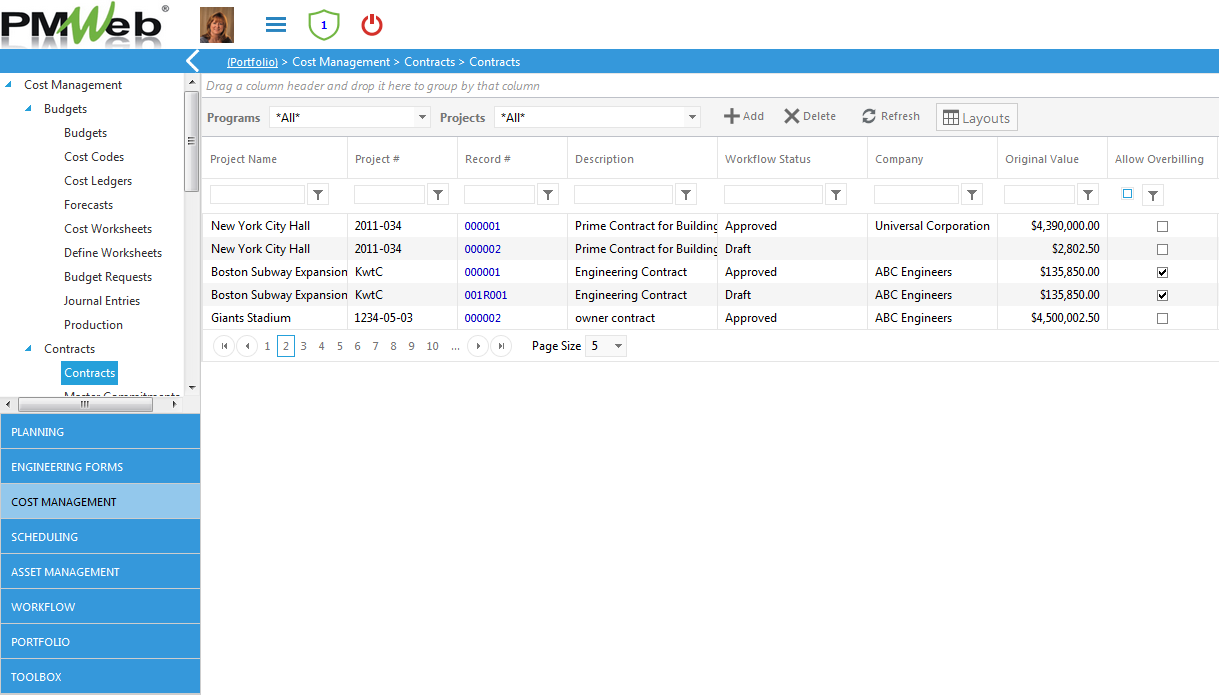
EXAMPLE OF A MANAGER PAGE:
The Manager Page is a list view that displays high level summary information regarding a type of form (depending on the form selected on the previous screen). From this view each user has the ability to change/edit what information is viewed on this screen. Records can be interactively filtered and from this view you have the ability to view, add and delete records with a click.
Once you select "add" you will be directed to another record screen (see next section).
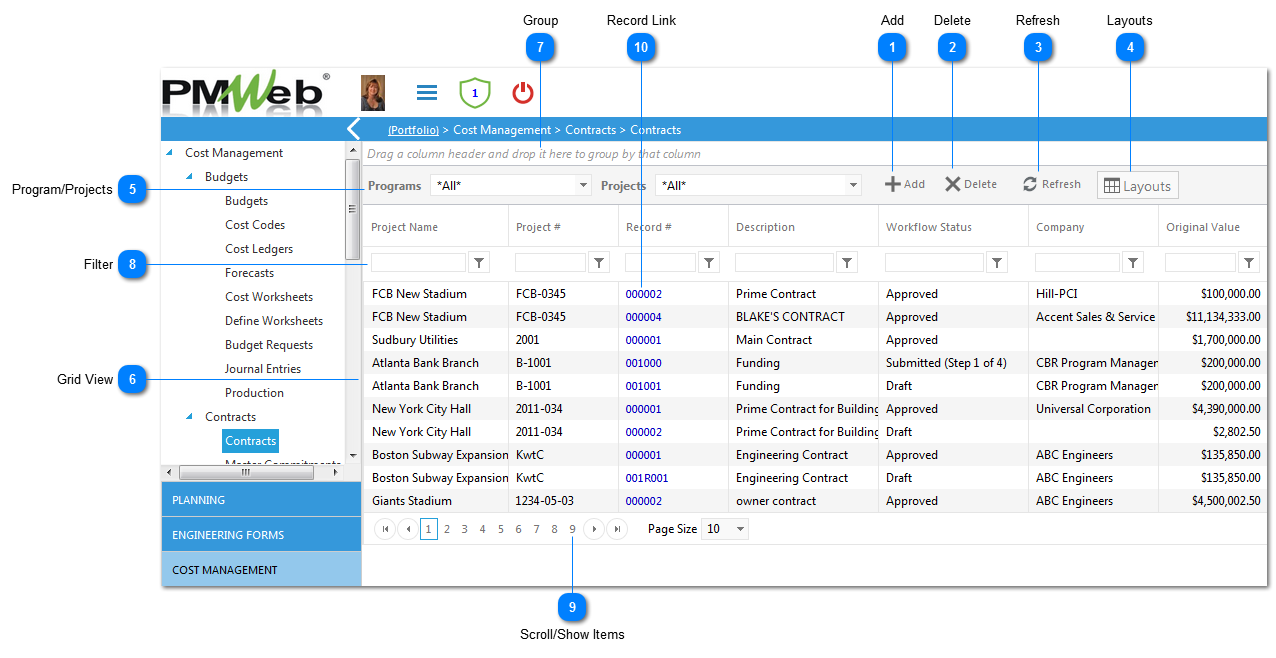
 AddClick to create a new record for the form selected in the Module sub-menu. Note: the record can either be created on this screen or by opening an existing record.
|
 DeleteDeletes an existing record. To delete, highlight the item you want to delete and click Delete. Note: once deleted, the form cannot be recovered.
|
 RefreshClick to refresh the data displayed on the screen.
|
 LayoutsClick to select the layout in which the data is displayed. To create a custom layout, right click the column header (project name, record #, etc.) and choose which column you would like to see. You can also drag and drop the column headers to your desired order. Utilize the filters to narrow down the results displayed. Once your layout is complete, click on "Layout" and then "Save As". Enter the name of your custom layout then click "Create Layout". Your new layout will now be displayed when the Layout button is selected.
|
 Program/ProjectsSelect the program/project you want to filter the information for. You can also start typing in the name of the project/program, instead of scrolling through all of the available options.
|
 Grid ViewThis area displays all records for this form. To narrow down the list, utilize the filters or program/project login functions.
|
 GroupUse this bar to group data displayed on the screen. To group, drag a column header (project name, workflow status, etc.) to this area, for as many grouping layers as you would like. Once your groupings are complete, click "Save Layout" and that grouping will remain for you any time you return to this screen.
|
 FilterUse to create different ways to view your data. Once selected, type in the information you want to filter by, then click the filter icon. Select from a list of how you would like to filter the data (contains, starts with, equals, etc.). PMWeb will do a search of the selected filter and the data in this section will be changed based on how your data was filtered. If you click on "Save Layout", this filter will remain every time you return to this screen.
|
 Scroll/Show ItemsUse to scroll through records for that form (typically used if there is a lot of data, several pages, etc.). The page size displays the number of records you want to appear on the screen. Utilize the drop down menu to change the number of items on a page.
|
 Record LinkClick on the blue record links to go to the Data Entry Screen and see the details of that particular record.
|