Any users in the system can submit a form into workflow once the data has been entered into that form. The following examples have been built into various Compass workflow processes:
Initiating a request for Authorization, agreements, and contracts
Initiating a furniture work order.
Initiating an estimate for final PFR approval.
The following steps describe how to submit a record for workflow approval.
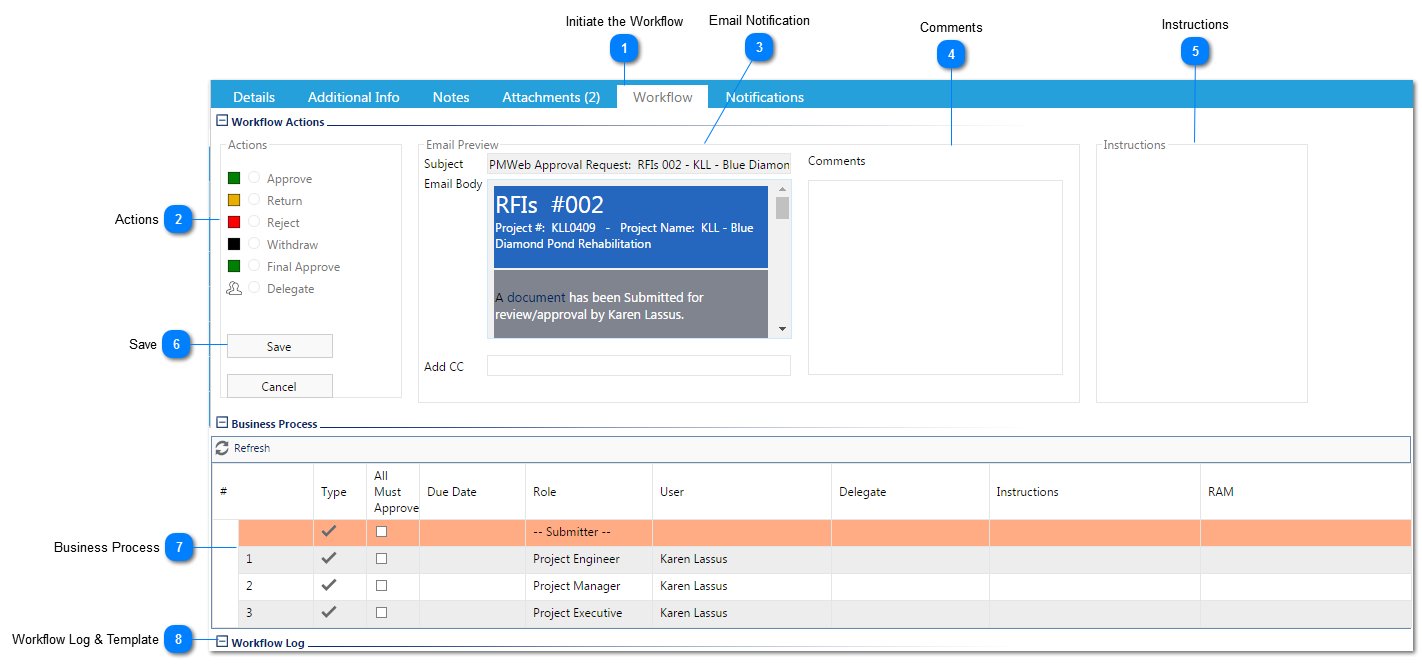
Initiate the Workflow
Click the Workflow tab and then click the Submit button and the Workflow Details section will populate with the steps that this record will be routed through. Note: if the process does not look correct to you, please click the "Cancel" button and talk to your PMWeb Admin about adjusting it. If the process is correct, click Save.
This section displays the actions that can be taken throughout the workflow. By default, the first action will be to Submit, so all other options are grayed out except for "Withdraw". The users in the remaining steps will have the option of selecting the following:
Approve: Moves the workflow to the next step.
Return: Returns the workflow to the previous step.
Reject: Ends the workflow, the record becomes locked.
Withdraw: Is only available for the workflow submitter (you). It returns the workflow back to you (the submitter) no matter where it is in the process. The record becomes locked and no more changes can be made to it.
Final Approve: Approves the record and ends the workflow process. Depending on how your PMWeb Administrator has configured the workflow this option will usually only be available if you are the final approver in the worfklow process.
Delegate: Allows the approver to designate a different person they would like to give the ability to approve this records in their place.
These fields will display the email notification information that the person assigned to the next step will receive. The only field that can be edited is the "Add CC" field. The format of the email is configured by your Administrator in the Workflow menu.
This section displays the instructions for the person assigned to this step of the workflow. This is configured by your Administrator in the Workflow menu.
Once all information has been entered and reviewed, click Save to submit the workflow to the next step. The person assigned to the next step will receive an email notification which includes the information contained in #6.
These fields display how the workflow is configured as well as status of the workflow as it moves through the workflow. The current workflow step will be highlighted in orange. The workflow is configured by your Administrator in the Workflow menu.
Once workflow is engaged, this section displays the workflow steps in a log and a visual format. Any comments from previous approvers and dates of approvals will be displayed in the workflow log.